Push an Invoice to Reckon
This document will help yo understand the featyres inside of CreataCRM, and what is sent to From CreataCRM to Reckon, And what is the rules in sending invoices.
First Check you settings in CreataCRM for Reckon Invoices,
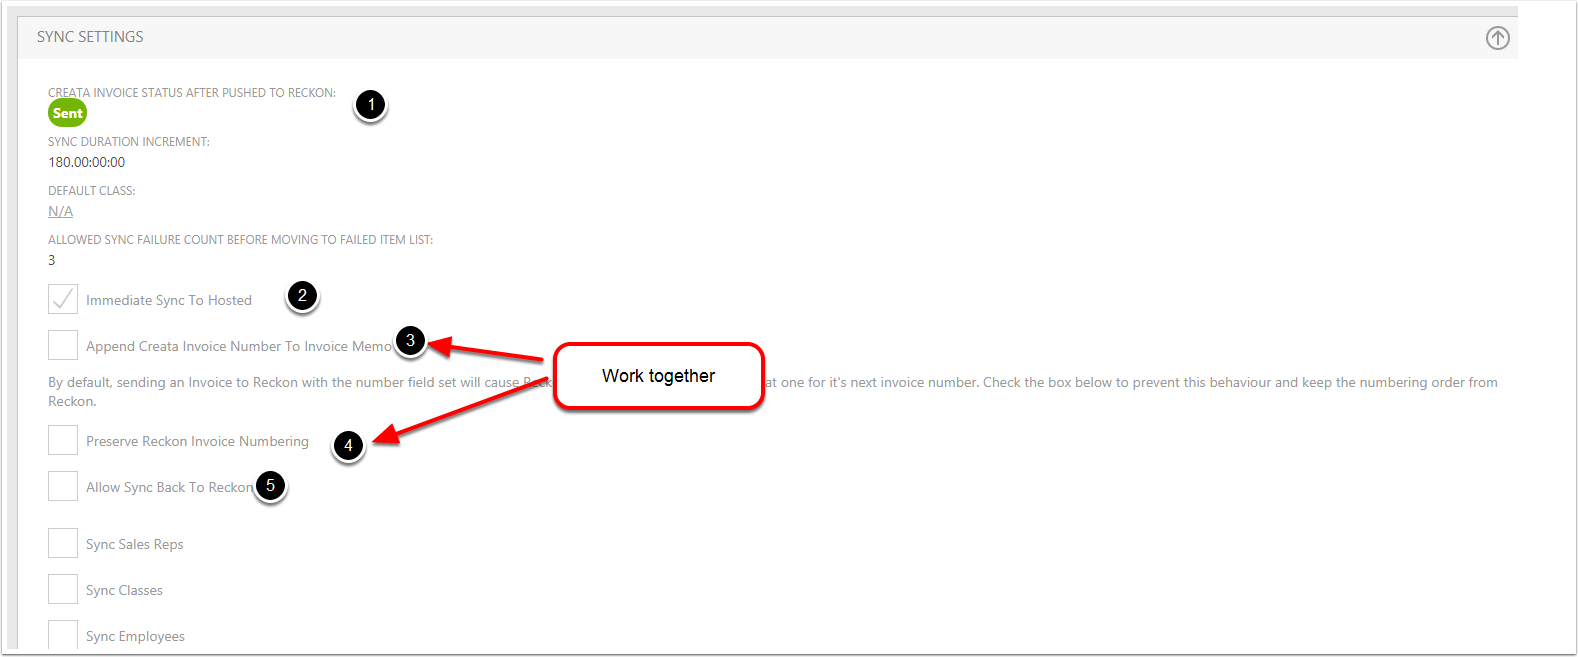
Setting relating to invoices to Reckon
- Unlike other accountancy system, Reckon doesnt have status field. If the blance is zero, it is marked a Paid. With CreataCRM, we have default status. Which is Draft, Sent and Paid. There are 3 default status in CreataCRM, Draft, Sent and Paid. You can custom design the invoice status. For more informaiton, you can click on here
- Immediate Sync to hosted is for Hosted users, this is important to get a imediate results, Like of the token has failed.
- Append CreataCRM invoice number to invoice memo. This is important if not are Preserving the Reckon Invoice. Meaning it will not use CreataCRM invoice number, but the number inside Reckon. Our advise is if you are still creating invoice inside the application, is to tick on this option, and tick on Preserve Reckon Invoice Numbering
- Preserving the number for reckon, If untick will send our numbers. This may cause the Number sequence to start jump around if you are creating invoices inside of Reckon. This can be turn on or off, So review with your admin team what is the best option.
- If you would like to send data to Reckon, Tick this option. If you untick this, it will remove icons to send to reckon
Other options for invoices settings is found in this document
CreataCRM settings for invoices
When sending a invoice to Reckon, you need to make sure that Customer (Company or contact) is in Reckon first. Please read this document to send the Company or contact to reckon. Once that customer is in reckon we can send the invoce, please goto Create invoices to create a invoice.
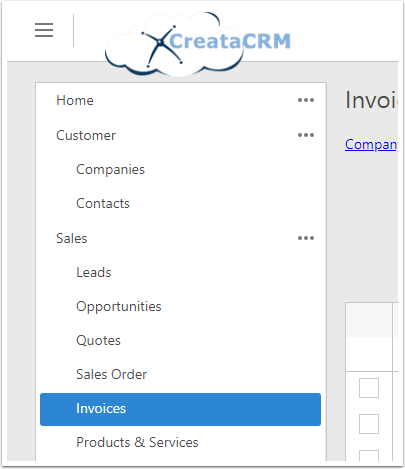
- Click on the Navigation bar
- Click on sales
- Click on invoices
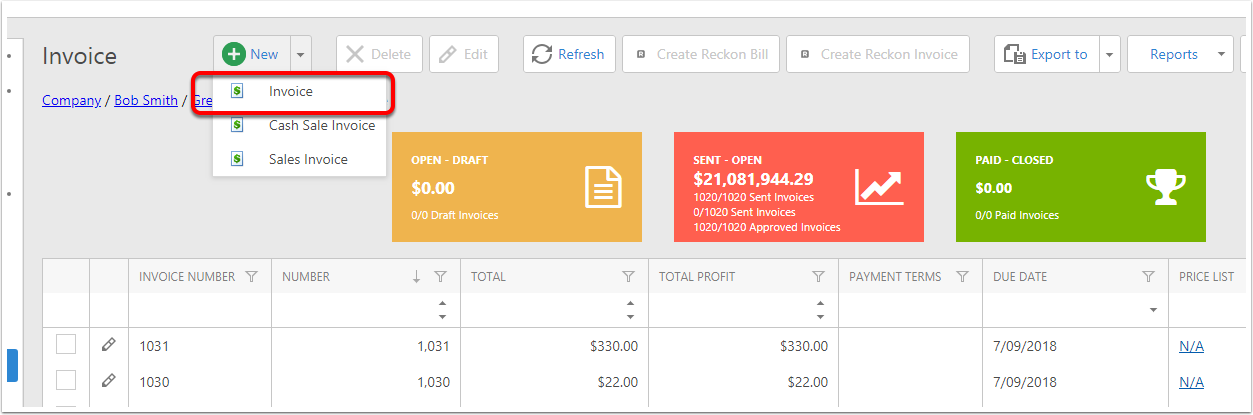
Click on the New - Invoice Button
- Click on the new button
- Click on the Invoice Button, Please note that the Cash sale invoice and the Sales invoice is for CreataCRM warehouse module, and should ignore if not using these modules
Type in the Customer
Because as have sync your reckon Customer, we would type in the customer. A Customer is either a Company or a Contact
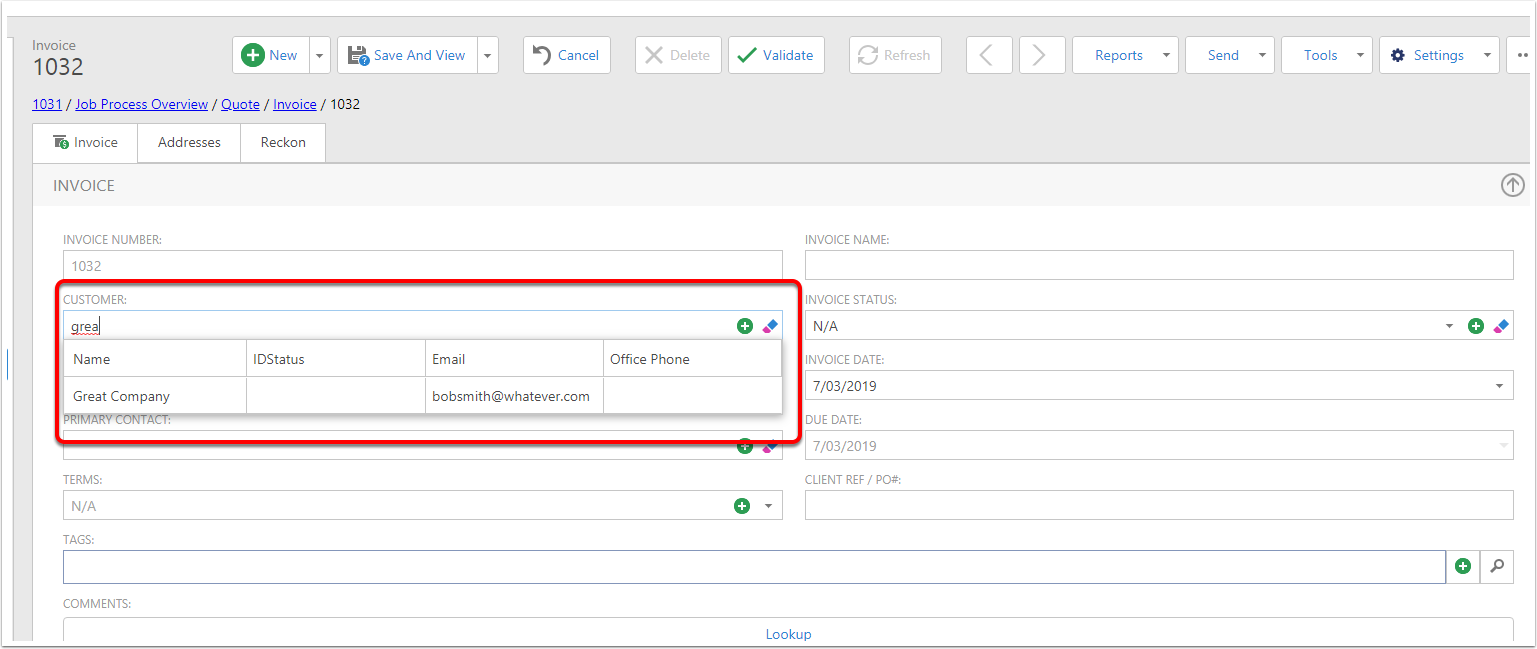
Invoice in CreataCRM
When you have type in the customer in CreataCRM, it will populate the Company and the contact.
For example the Customer Great Company has
- Company = Great Company
- Primary Contact on the company is Bob Smith
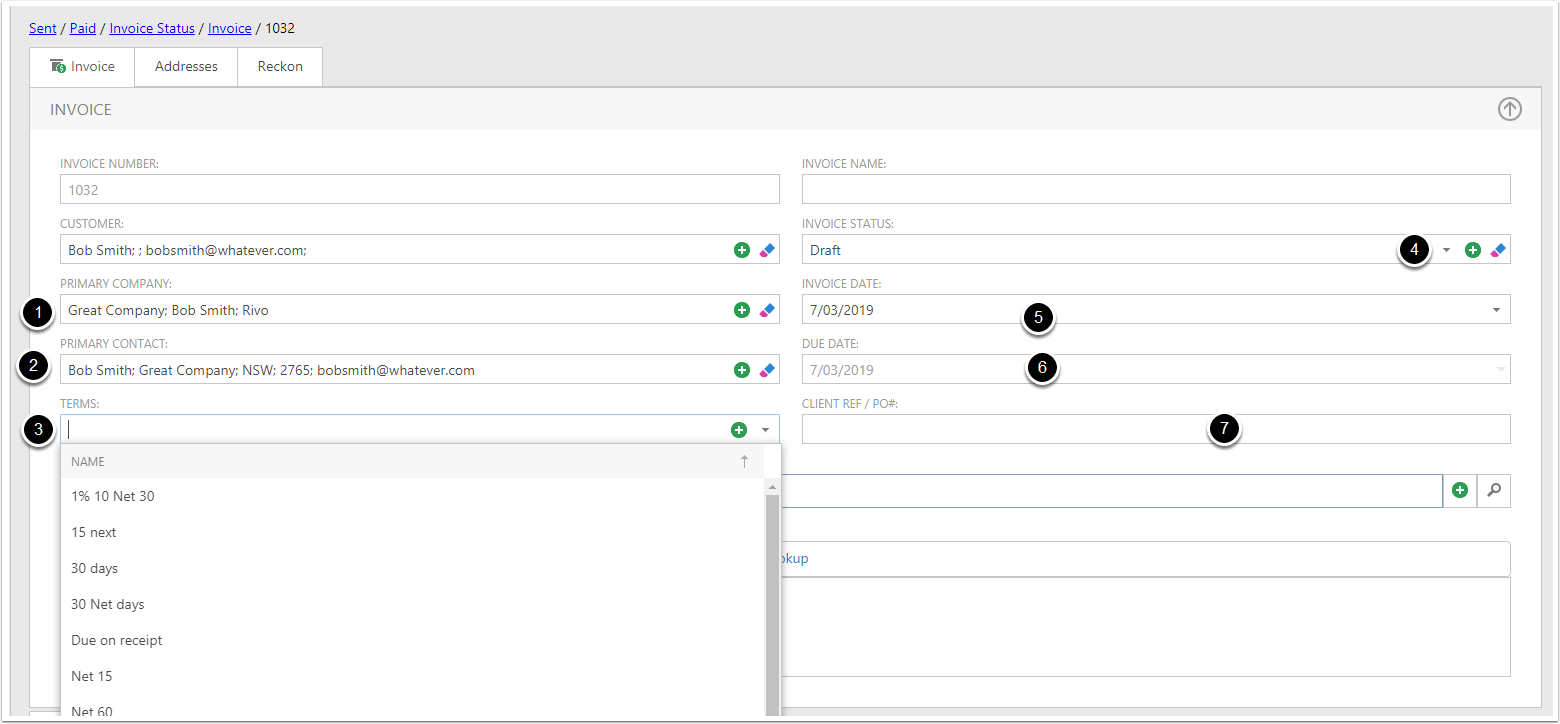
- If the Customer is link to the Reck Customer, it will link the terms, if not select the drop down menu, Likely we have sync the terms across. Change the terms will recalculate the Invoice Date. More inofrmation about terms click here
- Invoice Status, this is defaulted to draft. More information about Invoice Status
- Invoice date is todays date
- Due Date is calculated from the Terms field. IE 7 day term = Todays Date + 7 days
- Client Ref : This gets push to Client ref in Reckon
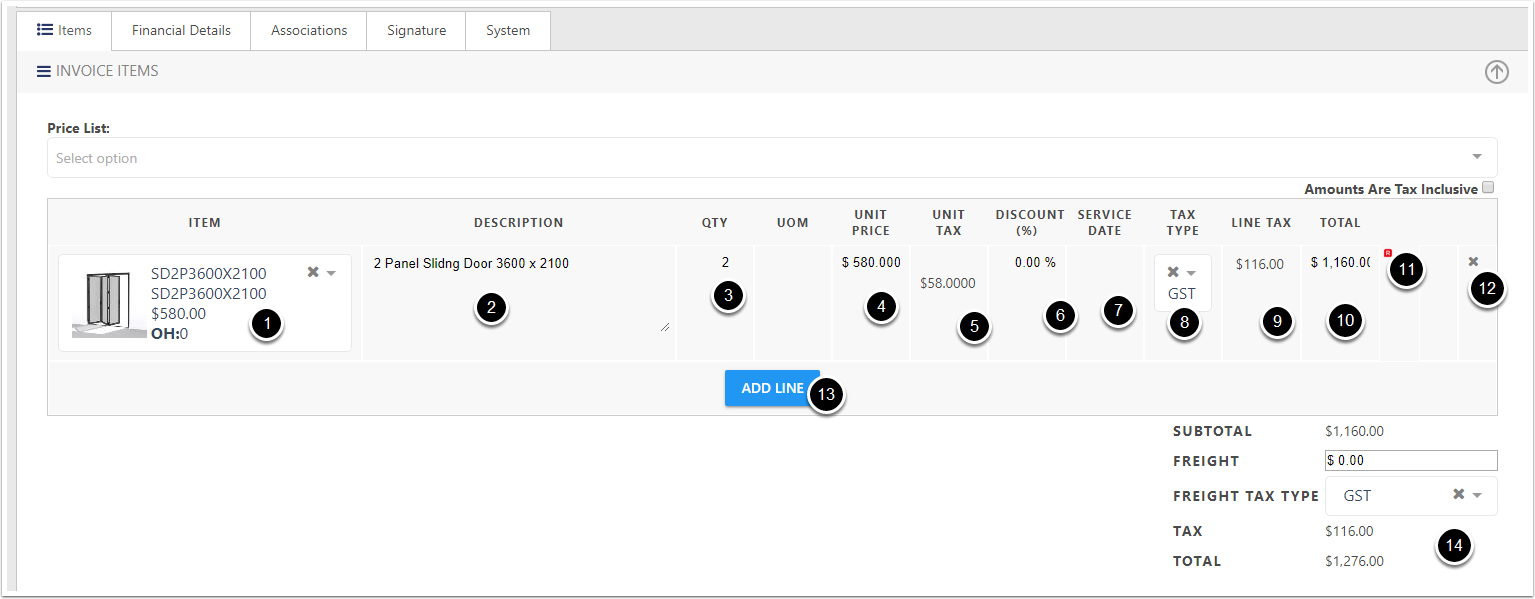
Invoice Line editor
- This will display the Item Number and name of the item . Plus a image from CreataCRM product service
- Description, likely came from reckon
- Qty on the invoice
- Unit Price. This is Sell Price in Reckon
- Unit tax
- CreataCRM we have discount, This is in %. For example 10 means 10% of Ex Tax price. Which would be 10% of 1,160.00 = $116 off the price.
- Service Date. This is populated if you are using Jobs
- Tax Type. This comes from Reckon
- Tax anount
- Total is the total of the line
- The r icon tells you that this item is in Reckon. If there is a c icon, that means its not in Reckon, and you will need to send this over.
- This is how you delete the line.
- Add another line
- Totals
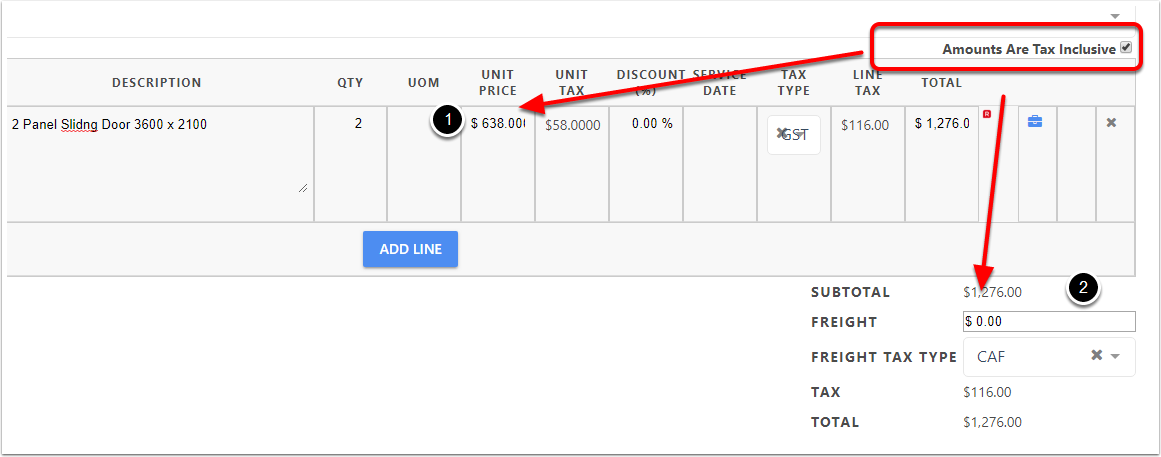
GST applied
If you tick on the Amount are Tax inclusive, will display GST in the unit price, this si great for B2C markets
- Changes the Unit Price
- Sub Total
Once finsihed , Save the invoice
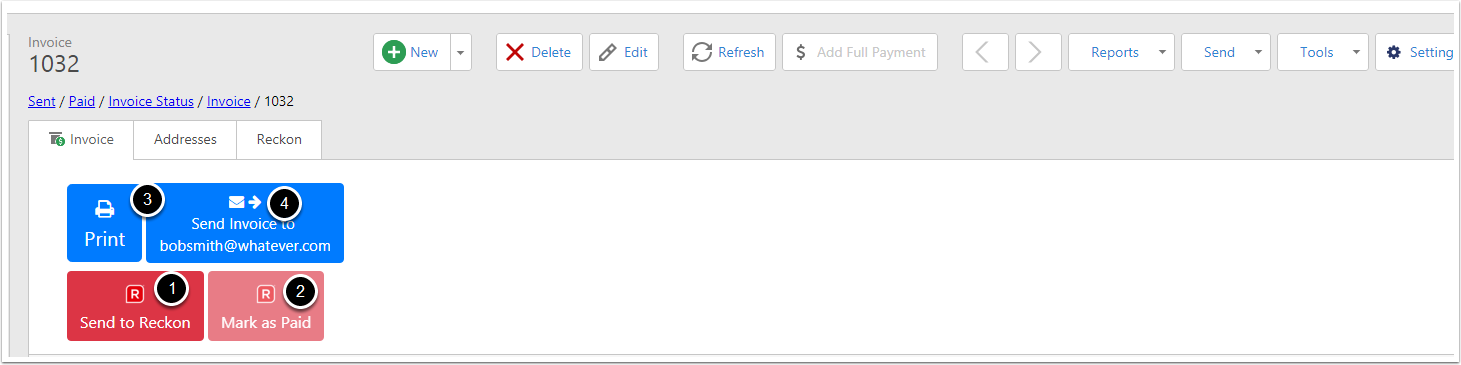
Reckon Action Buttons
- Send to Reckon will send the invoice to Reckon
- Mark as Paid, this is greyed out, this will be activated when sent to reckon as a invoice. You can will be able to pay the the invoice or part pay.
- Print the invoice, Default settings
- Email the invoice Default settings
Sending the invoice
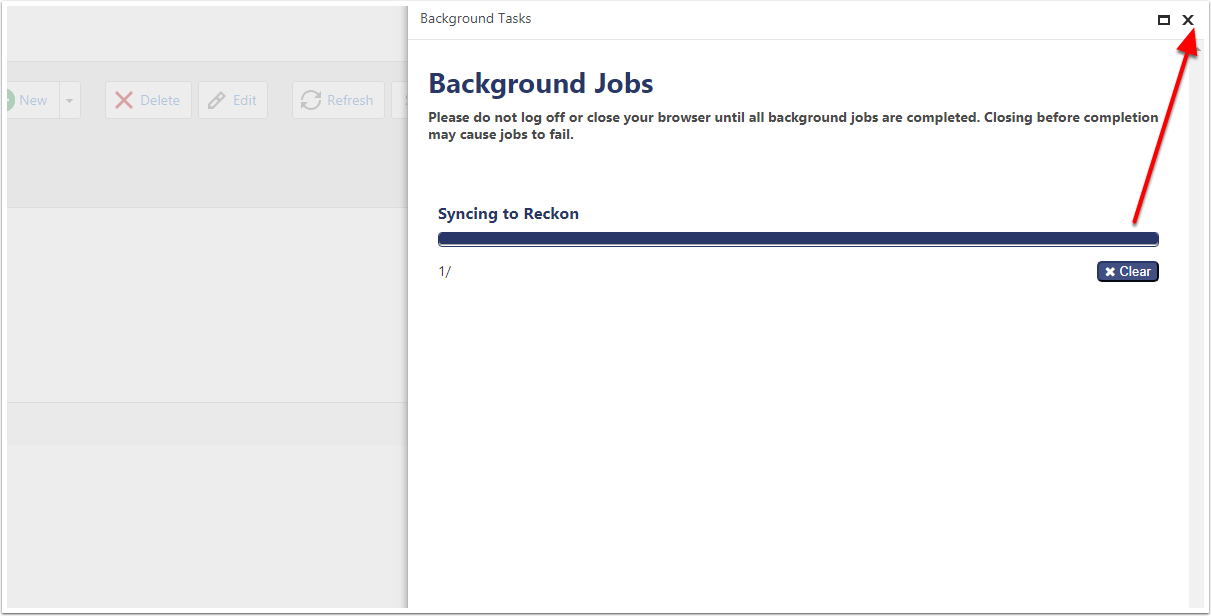
Click on the Send to Reckon Action Button
This will display a pop-up progress bar, saying it has been sent. If you are on Apple devices, you may need to disable the background tasks. Goto your user settings to do this, Click on the x button to clear this
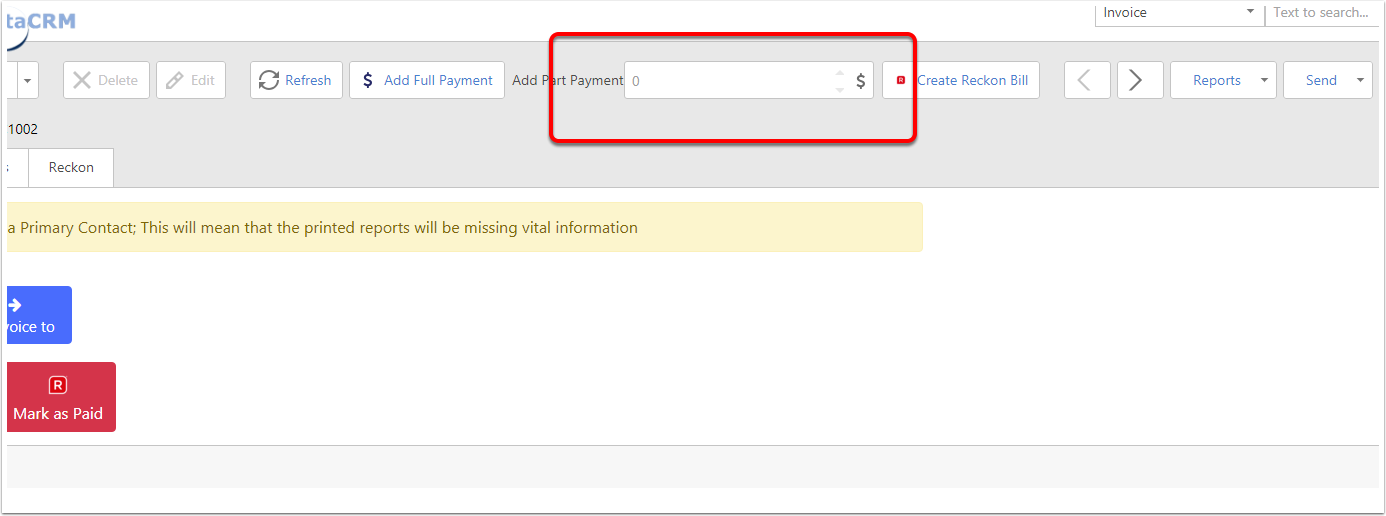
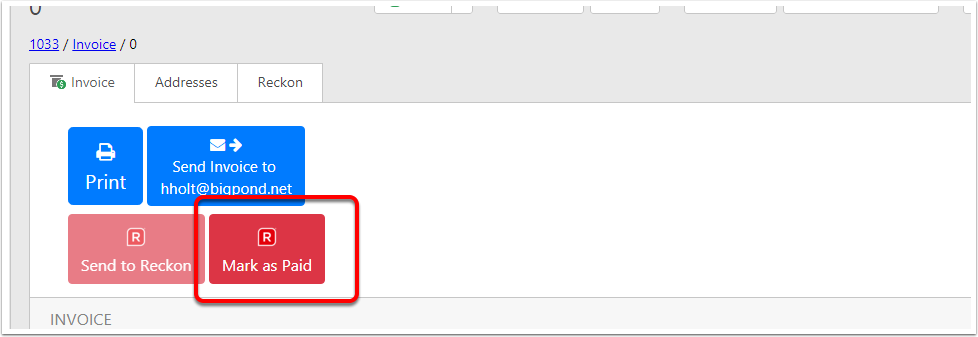
Marking an invoice to be paid
If the invoice has been sent to Reckon, and the balance is greater than zero, the Mark as Paid will display. Click on this button and this will add payment to this account,
Part Payment
You can make part payment, if the client would like to add a deposit.