CreataCRM Multiple Warehousing with MYOB
Overview
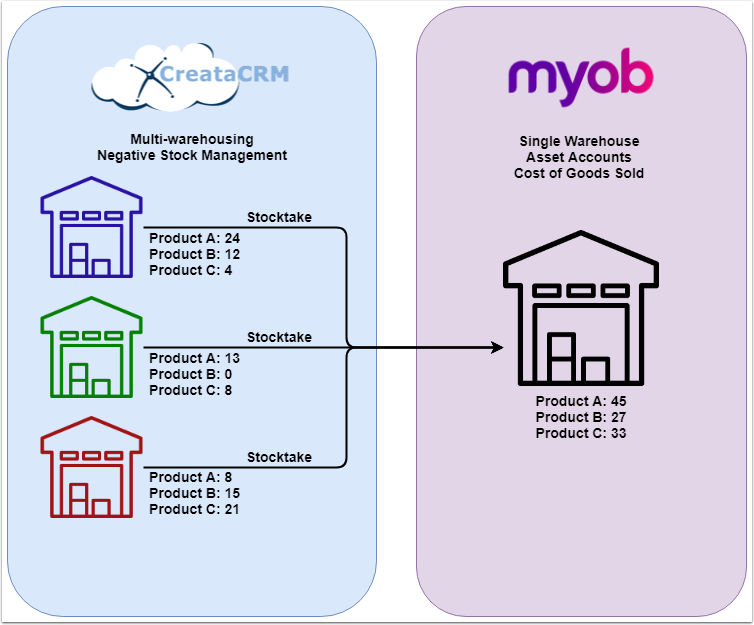
CreataCRM Warehousing integrates with MYOB Live. You can manage multiple warehouse stock levels in CreataCRM, and they will be automatically tallied and synced to MYOB
MYOB Stock Preparation
As CreataCRM utilises multiple warehousing, it combines the stocks from all warehouses when syncing stock data to the MYOB master warehouse. We greatly suggest that you perform a stocktake of your MYOB warehouse before configuring Warehouses in CreataCRM.
Additionally, we highly reccomend that all your MYOB items should be Inventoried in MYOB before they are synced to CreataCRM. Items should be Inventoried in MYOB before you perform the MYOB stocktake.
For more information on performing an MYOB stocktake, click here
CreataCRM Warehouse Preparation
Now that you've confirmed your MYOB items are correctly inventoried, and have performed a recent MYOB stocktake, we can start adding Warehouses in CreataCRM.
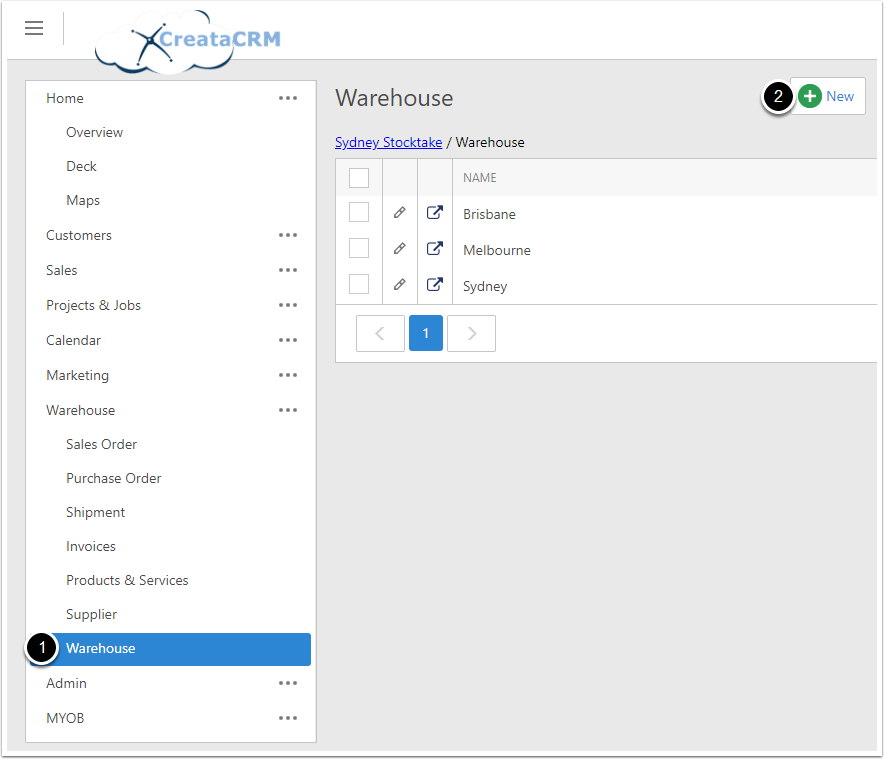
To add a Warehouse:
- Naviagte to Warehouse
- Click New
Configuring the new Warehouse
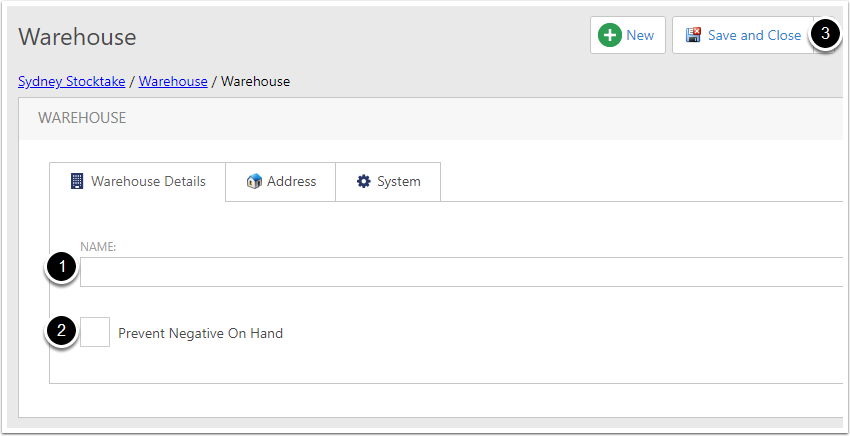
To configure the new Warehouse:
- Add a Name to the Warehouse
- Tick Prevent Negative On Hand if the Warehouse isn't allowed to have negative stock
- Click Save and Close
Syncing the MYOB items into CreataCRM
With the required Warehouses now existing in CreataCRM, we can begin syncing your MYOB items into them. Refer to MYOB documentation for linking MYOB.
Adding a Product Service to a Warehouse
Since you are splitting your MYOB stock between multiple warehouses in CreataCRM, you will need add the Items to their respective warehouses manually.
- In the Product Service you want to add to the Warehouse, click Tools
- Click on Add To Warehouse

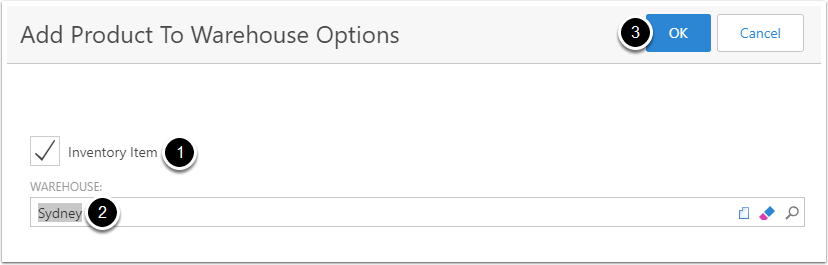
Choose which Warehouse to add the item to
- Untick Inventory Item if it's not an inventoried item, such as labor costs
- Select the Warehouse to add the item to
- Press OK
Warehouse Stocktake
Once your new Warehouses have had items assigned to is, you can start running stocktakes for the Warehouse item quantities.
NOTE: You can only stocktake Items that are Inventoried (Mentoined above in MYOB Item Preparation)
Stocktake for single item vs Stocktake for multiple items
Depending on your adjustment needs, you may want to stocktake a single item, or a selection of items
- To stocktake a single item, click on that items Tick icon
- To stocktake multiple items, highlight the items you want to stocktake, and click Tools > New Stocktake Selected

Configuring the Stocktake
Once you've chosen the stocktake you need, a popup will appear.
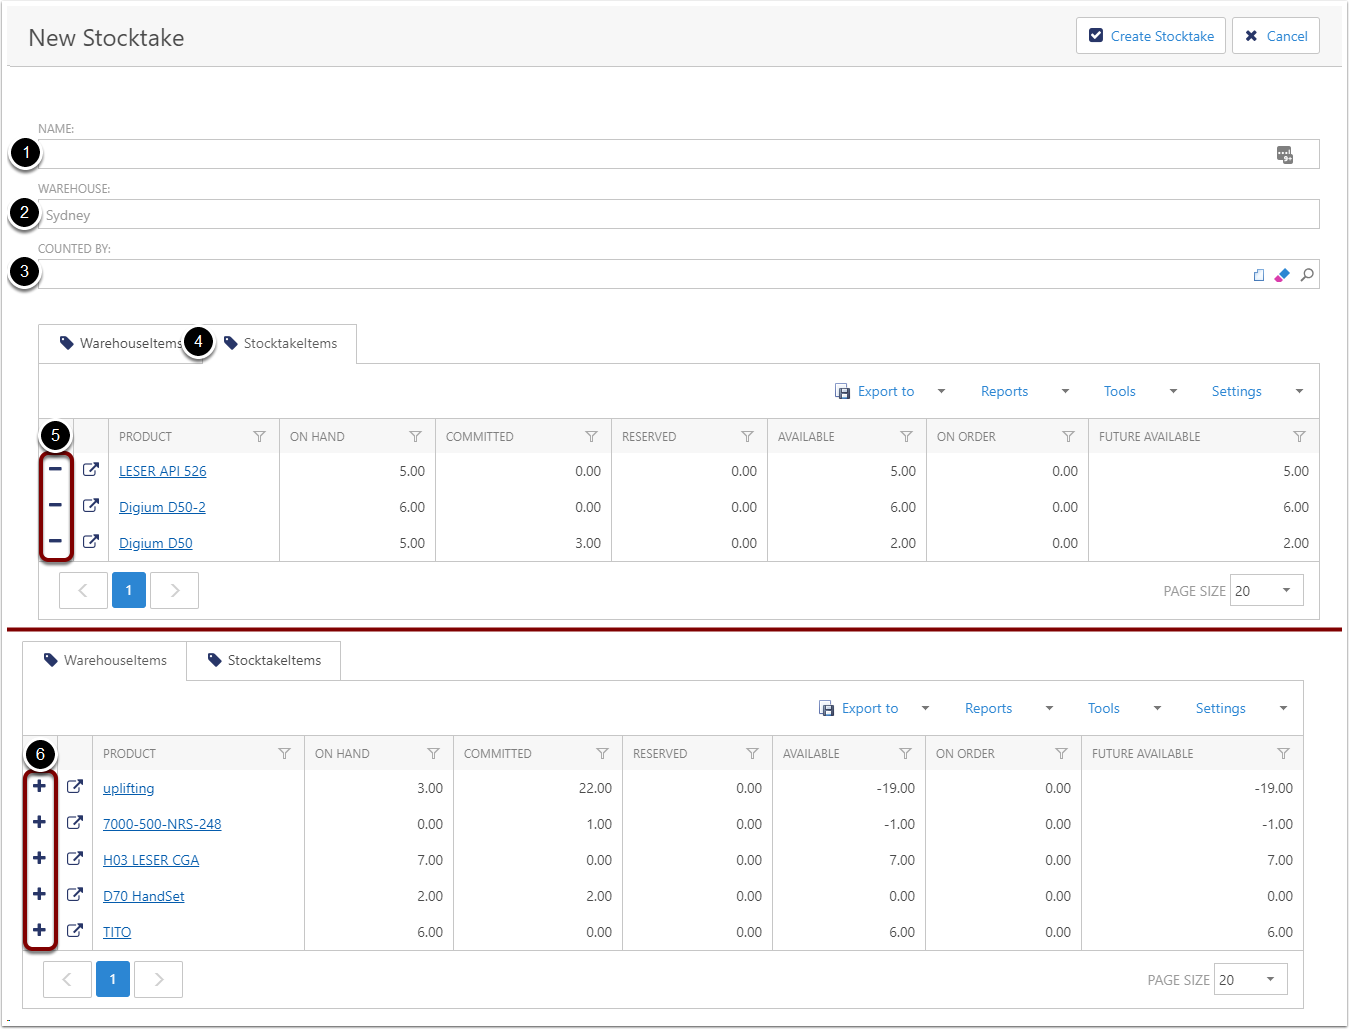
In this popup you will:
- Need to enter a name for the Stocktake, e.g 'June 31 2017 Stocktake Sydney'
- Check that the correct Warehouse is selected
- Choose which CreataCRM user is performing the stocktake
- Check that the correct items are selected for the stocktake
- You can remove an item from the stocktake by clicking the - button in the Stocktake Items tab
- You can add an item from the warehouse by clicking the + button in the Warehouse Items tab
Adjusting the Stocktake
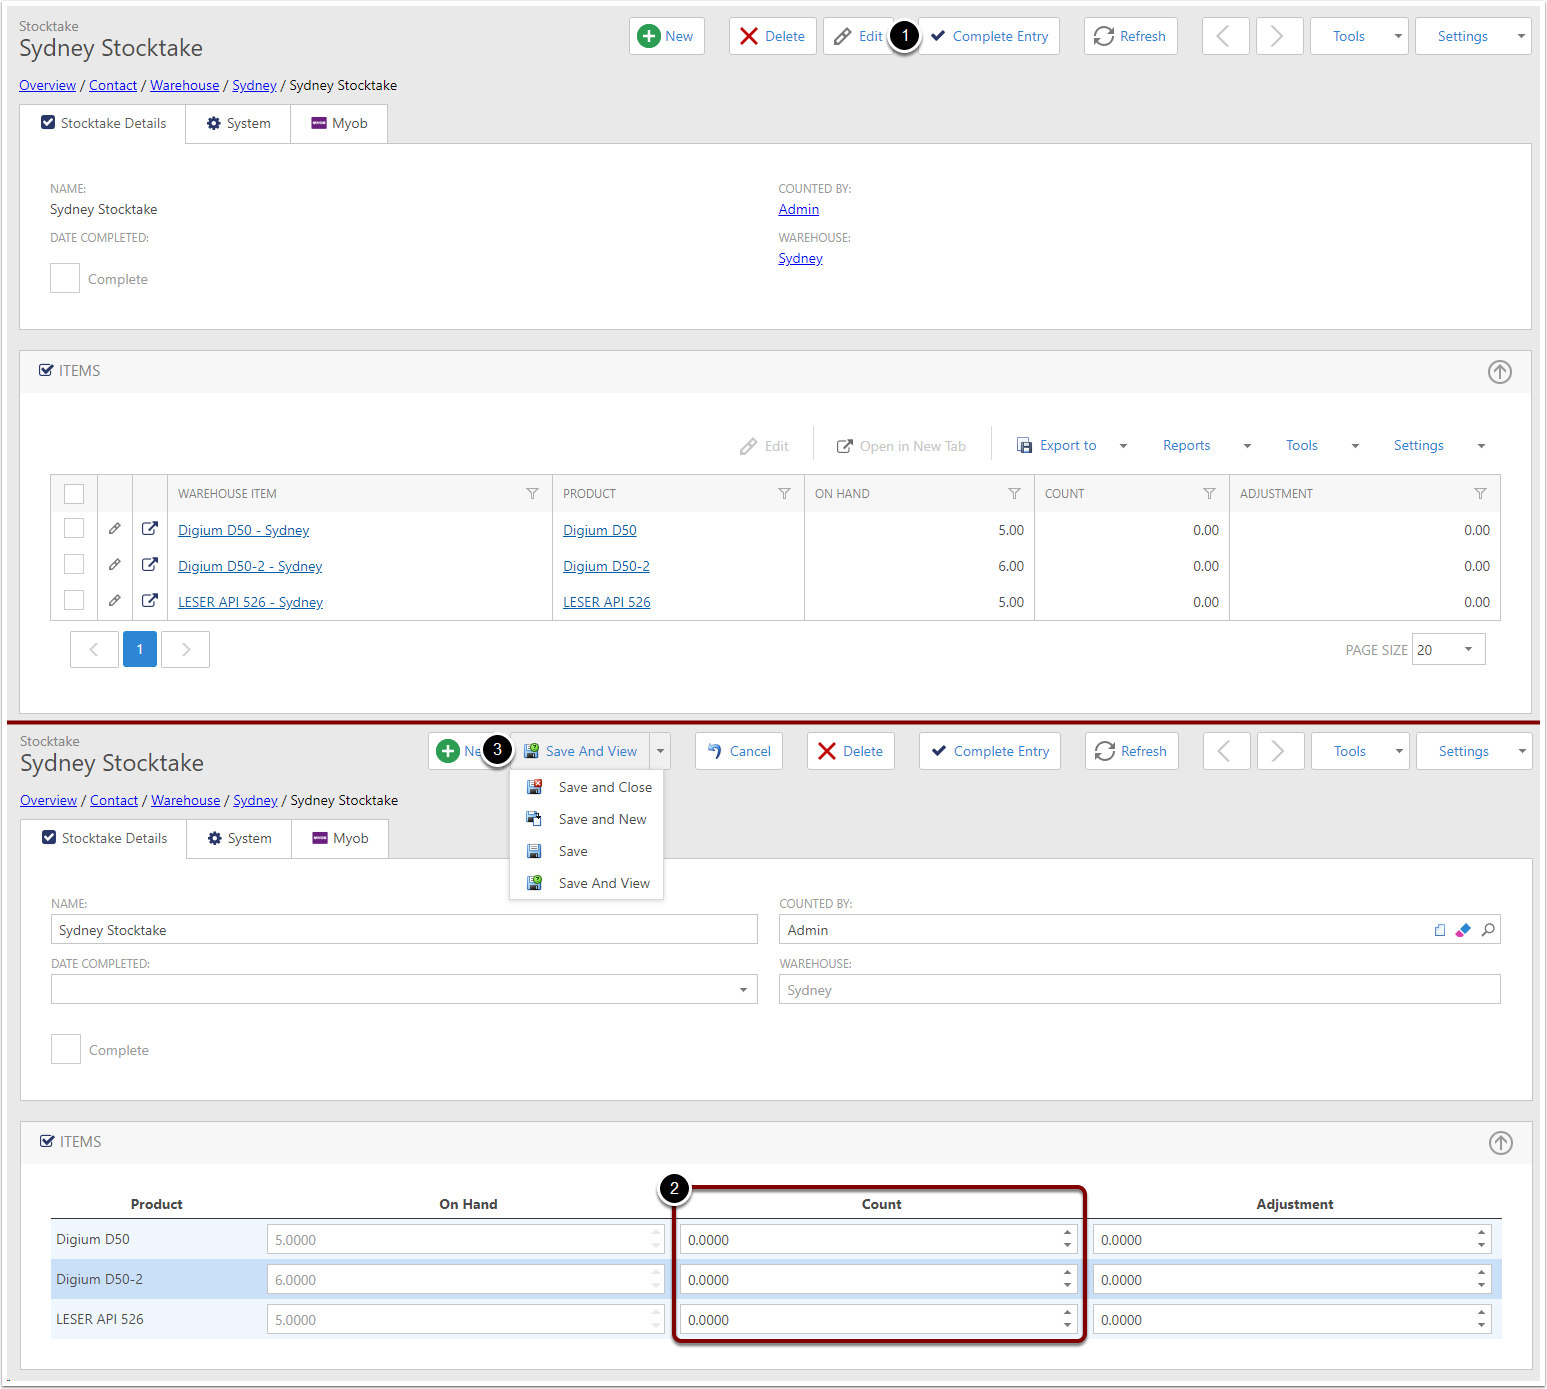
To add counts to the Stocktake
- Click Edit
- Set the Counts for the items you've checked stocktake on
- Click Save and View
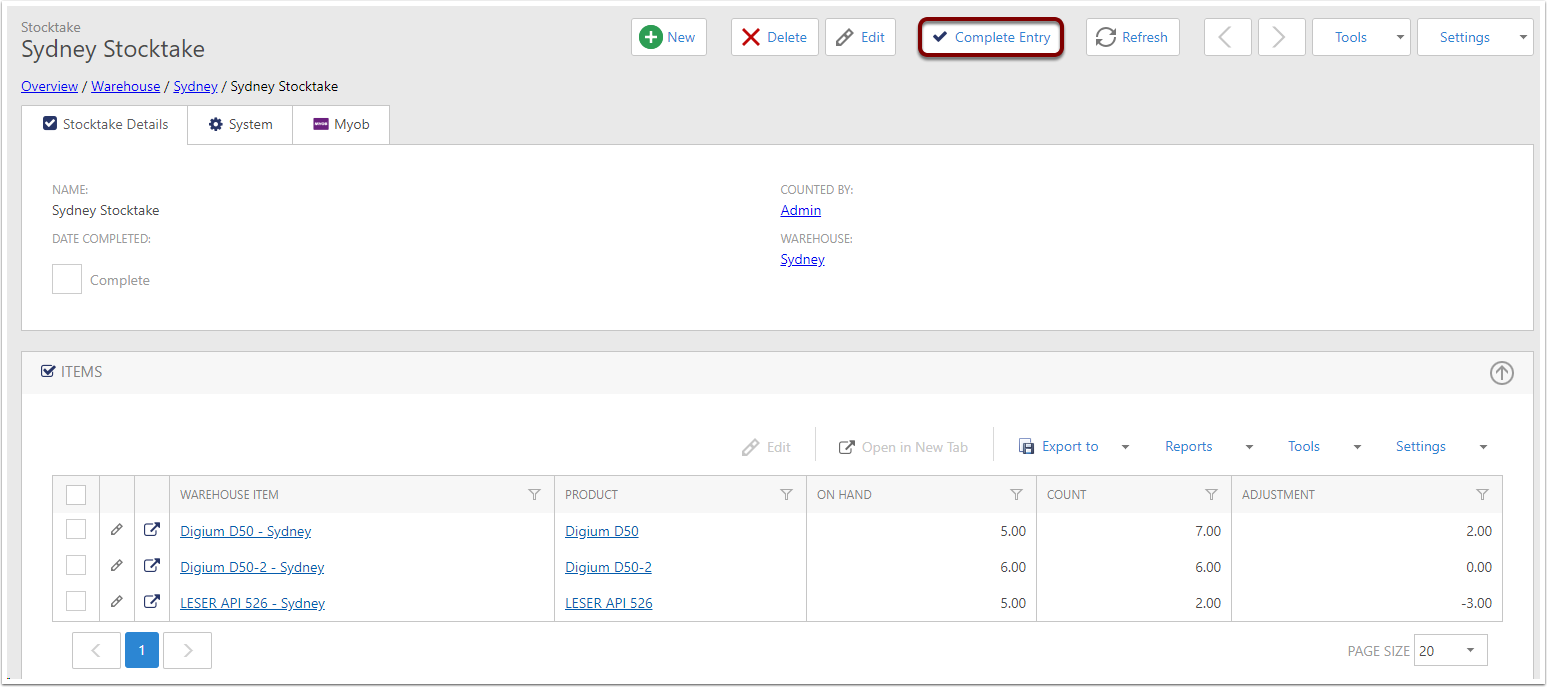
How Adjustment works
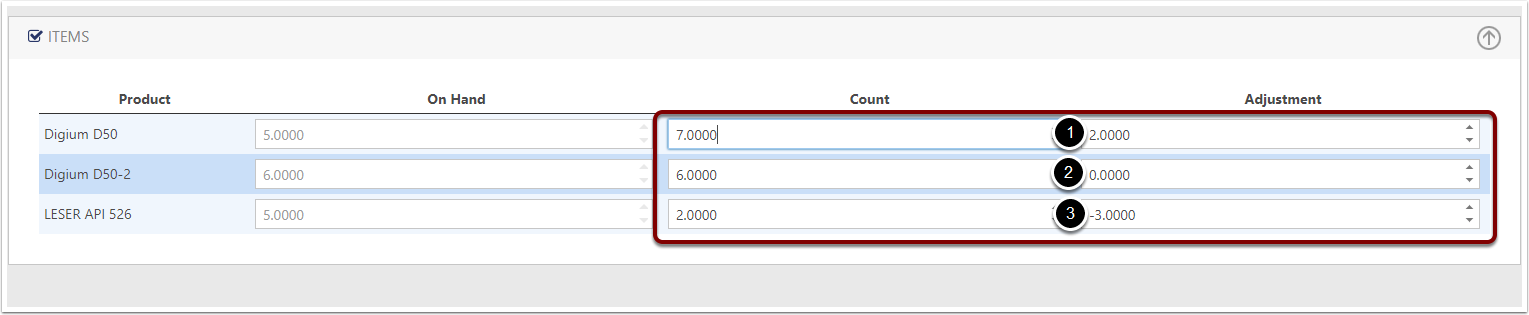
The select region is the adjusted stock take you can enter as you count real time
Examples below
- Counted 7 means that the D50 is automatically adjusted by 2, as the count was less than recorded on hand
- Counted 6 means that the D50-2 is automatically adjusted by 0, as no adjustment is needed
- Counted 7 means that the LESER API is automatically adjusted by -3, as the count was greater than recorded on hand
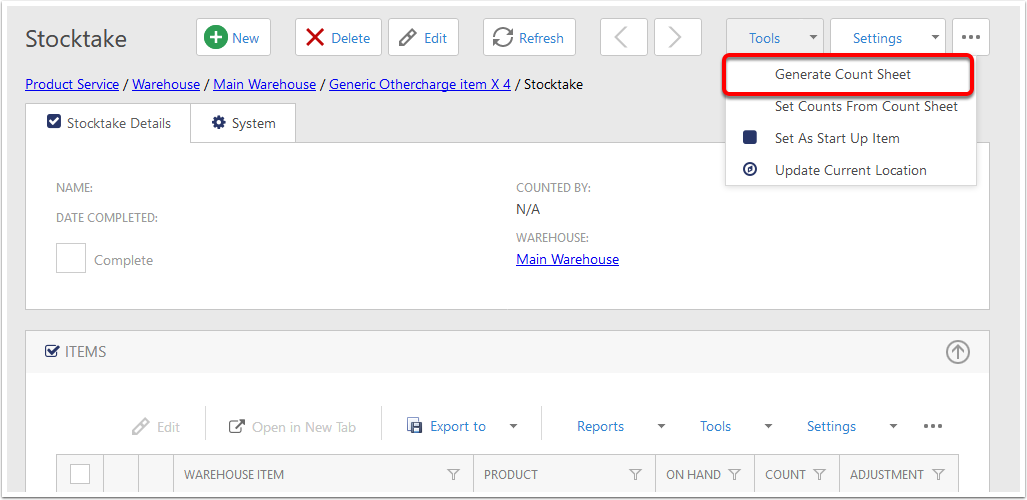
Using Count Sheets [1]
When viewing the Stocktake, in the Tools menu there is an option to create a Count Sheet.
This will create a document that can be edited to set the current counts of all items on the stocktake.
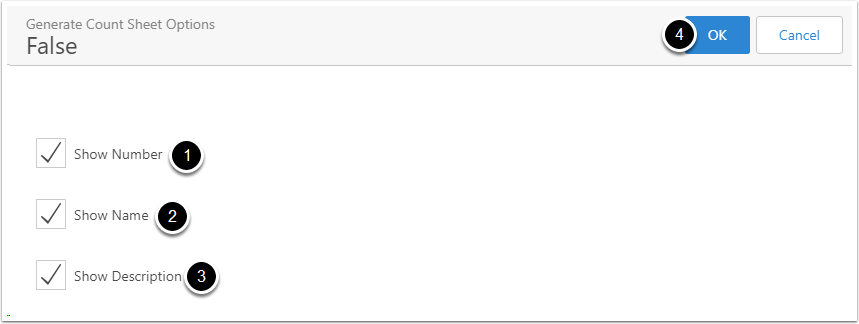
Using Count Sheets [2]
The Generate Count Sheet Options popup will appear:
- Tick Show Number if you want the item sheet to includea column for Item Number
- Tick Show Name if you want the item sheet to include a column for Name
- Tick Show Name if you want the item sheet to include a column for Description
- Click OK
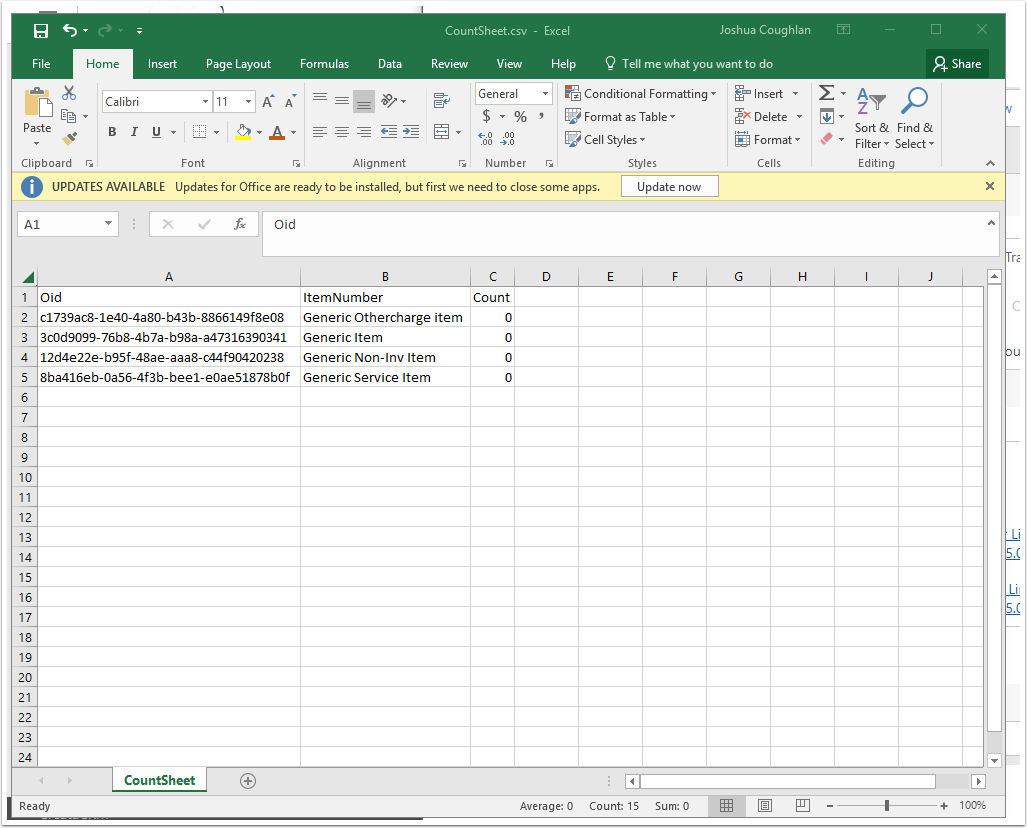
Using Count Sheets [3]
Your browser will download a CountSheet.csv. Opening it, you will see it contains the columns you specified in Using Count Sheets [2]
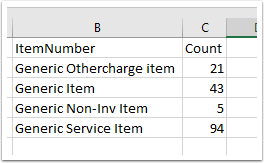
Modify the Counts
Chang the numbers in the Count column to match what they should be. Make sure to save the document after the changes have been made.
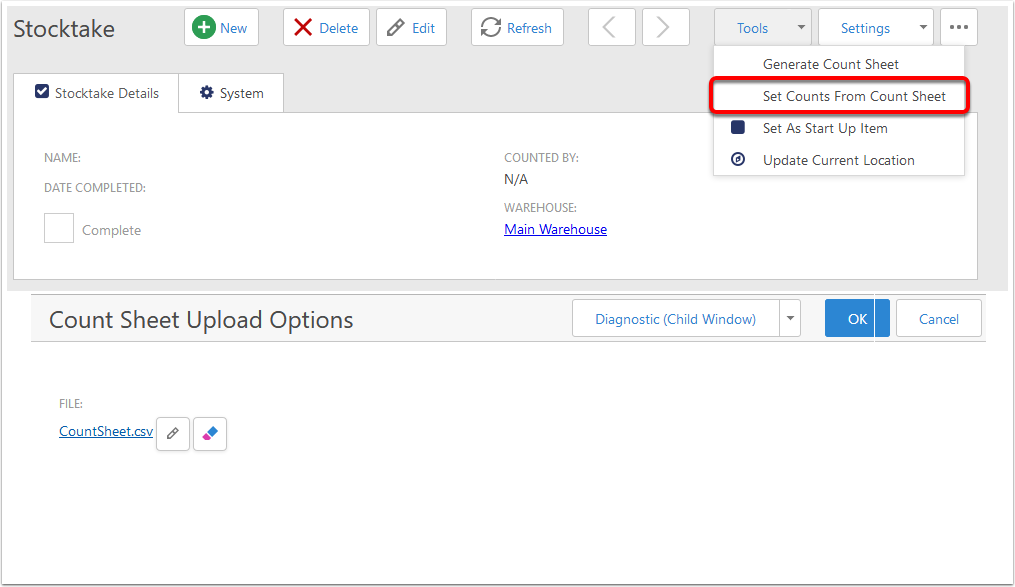
Upload the Count Sheet [1]
Back in CreataCRM, in the tools menu, choose Set Counts from Count Sheet
Browse to the file that was created, and upload it. Click OK to set the stocktake values.
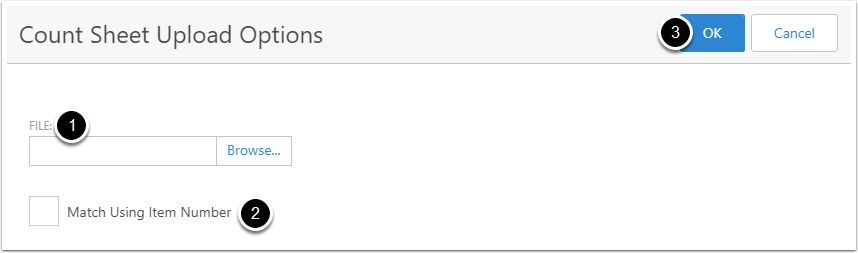
Upload the Count Sheet [2]
The Count Sheet Upload Options popup will appear:
- Select the CSV file you want to upload counts from
- Tick Match Using Item Number if you want to match counts based on the Item Number column, instead of the Oid column
- Click OK
Completing the Stocktake
Once you have finished making the necessary adjustments for each stock item, click Complete Stocktake to lock in those adjustments
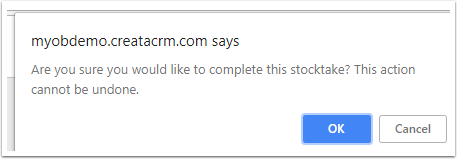
Confirm
When selecting Complete Entry, it's going to ask you are you sure. Click Ok to confirm.
NOTE: Once you complete a stocktake, you cannot reverse any adjustments unless you create a new stocktake. So double check your adjustments before locking them in.
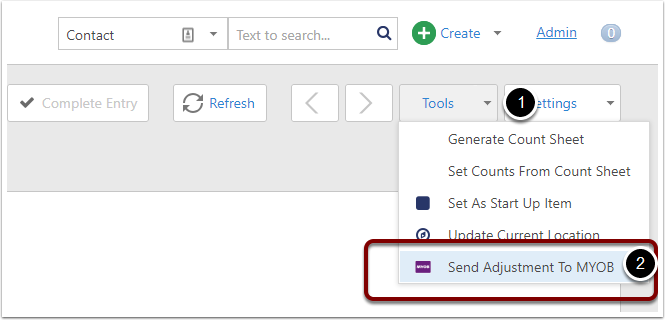
Send to MYOB
- Click on Tools Drop down inside of Stocktake
- Select Send Adjustments to MYOB